In this article we will discuss how to create a layer of points with ArcMap containing positions and links to » geotagged » photos .
Geotagging is to specify the geographic coordinates photos by changing their data (or tags) EXIF . EXIF (Exchangeable Image file format) of a photo includes information such as the camera type, date and time of shooting etc …
If you have a camera for shooting equipped with a GPS, the location data can be included automatically . For example , if you have an iPhone you can enable geotagging pictures (see how to enable this page : How to turn photo geotagging on your iPhone or iPad).
If you don’t, you can use software such as Locr GPS Photo (free) or RoboGeo (fee) to include a location in your images.
To download the software » Locr GPS Photo for Windows « :
To download the software Robogeo , go to this page: http://www.robogeo.com/home/download.asp
Suppose you use an iPhone or equivalent . The images integration procedure in ArcMap is extremely simple.
1- copy your images in a directory . Using Windows Photo Viewer , for example , make sure that the photos are oriented correctly . Since you are going to link the images to the created layer, the images will be viewed directly with ArcMap. Therefore, it is essential that they are stored at the right place .
2-Open ArcMap and the Toolbox window. Launch the tool GeoTagged photos to points

3-Set the tool .

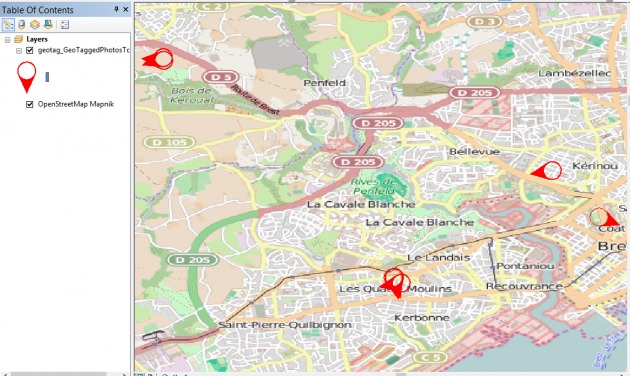
It is possible to create an output layer in shapefile, but in this case you lose the link to the images. You will only have the position of these. Therefore, opt by a storage subclass as an entity of a file geodatabase . 4- Run the tool . The result appears in the cartographic window .

You can change the images points symbology to indicate the position of the photo. In effect , if we display the attribute table of the new layer created one observes a field Direction.

To position the symbol according to the direction of each image: open the properties layer -> tab symbology

Click Advanced -> Rotate and select the Direction field and the option Geographical

Now, the symbols show the orientation of the shooting on the ground.
To view an image from the corresponding symbol in the map you can :
- the tool information

In the window that opens the lit up symbols allow opening the image linked to the corresponding point .

- use the HTML popup

The image is interpreted as being part of the point information and is displayed automatically
